
Cardinal Points
The cardinal points of the compass are the points that have names. The four cardinal points of the compass are North, East, South and West. Some directions can be given as combinations of these cardinal points. For example, North east is a direction half way between North and East. Further refinements can be added, for example North north east is a direction half way between North and North east.
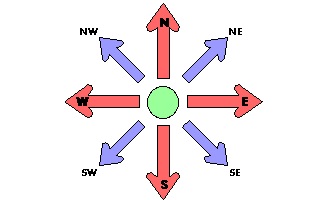
The cardinal and major points of the compass.
The names of these directions can be abbreviated. For example, North would become N, North East would become NE and North North East would become NNE. Note that if a direction is given as a name (rather than as a bearing), then it should only be taken approximately. If someone says head towards the knoll just North of the main peak, they don’t mean head towards any knoll you find on a bearing of ° from the main peak.
Similarly, if you intend to give precise directions, use bearings rather than compass points. For example, use Travel for 20km on a heading of 45°M (magnetic) is better than Travel North East for 20km.
Degrees
The circle of the compass is divided into 360 divisions, called Degrees. The symbol for bearing degrees is the same used for temperature degrees – °. Unless otherwise specified, when these notes show a bearing in degrees, they mean a magnetic bearing. To indicate which bearing system I’m using, I usually add M, G or T, meaning Magnetic, Grid or True, respectively.
The cardinal point North becomes 0°. East becomes 90°. South becomes 180°. West becomes 270°. Note that North is also 360°, but by convention we only use 0°.
Deviance
There are three different types of North:
* Magnetic
* Grid
* True
The most important to us as hikers is Magnetic North. This is the North that the compass needle points to. At present, Magnetic North is located under Canada somewhere. The second most important North is Grid North. This is the North which the grid lines on our map are aligned with, and is defined by the Australian Mapping Grid (well, in Australia it is!). The third North is True North, which is the direction towards the North Pole of the Earth.
In Australia, these three Norths are never the same. There is always a small deviation between Grid and True North, depending on how the map was drawn. There is usually a large deviation between Grid or True and Magnetic North.
On a map with a Grid/Magnetic deviation of 13°, and a Grid/True deviation of 1°, these bearings would be the same direction: 13°T, 14°G, 1°M. Note that a deviation of 1° equates to about 20m over 1km. If you make the mistake of using a True bearing to find your path with the compass, you could be out by as much as 250m over a 1km stretch!
Taking A Bearing To Something
Finding the Magnetic bearing to something is easy, regardless of the compass you use. We usually use the Silva style compass, so I’ll describe here how that works.
1. First, locate the object or feature that you want to take a bearing to.
2. Now point the Direction Of Travel arrow at that object or feature.
3. Finally, hold the base of the compass steady and turn the dial so that the red arrow on the base of the dial is underneath the read half of the compass needle.
4. Read off the Magnetic bearing.
Following A Bearing
Following a bearing is a little tricker.
1. First you need to convert whatever type of bearing you are given to a Magnetic bearing.
2. Then, turn the dial of the compass so that the Magnetic bearing you want is lined up with the Direction Of Travel arrow.
3. Now move the whole compass around so that the red half of the compass needle is above the red arrow on the base of the compass dial.
The Direction Of Travel arrow is now pointing in the direction you need to go.
Tricks of the trade
Here are some useful tricks to remember when you are navigating or planning a route.
Converting Bearings
Remember: Magnetic Deviation West, Compass Best. Magnetic Deviation East, Compass Least.
This means that if the Grid/Magnetic deviation is to the West, you always ADD that number to the Grid bearing to get the Magnetic bearing – that is, the Compass bearing will always be a better number than the Grid bearing.
If the Grid/Magnetic deviation is to the East, you always SUBTRACT that number from the Grid bearing to get the Magnetic bearing – that is, the Compass bearing will always be a lesser number than the Grid bearing.
To convert from Magnetic to Grid, go the other way. Instead of adding, you subtract, and vice versa.
Bearing Off
If you are heading towards a linear feature such as a road, fence or river, and you want to find a point like a cattle grid, gate or bridge, use a technique called bearing off. To do this, you aim to miss the target. Sounds strange? Well, here’s an explanation.
If you head directly towards a target, you will probably miss. Say you want to find a gate located on a road. You set your bearing to head directly for the gate. On the way, you move around a few obstacles, which only compounds the error in your compass bearing. So you arrive at the road, but you don’t know whether the gate is to your left or right.
So aim, say, 4° to one side of the target. By aiming to one side of the target, you will always know what direction to travel to find the target. But make sure you aim off far enough to allow for the error in your compass bearing. One way to allow for error is to aim off by 4°, then round off to the next furthest mark on the compass dial.
For example, if the gate I am travelling to is supposed to be at 105°M, I would aim North a little, so subtract 4° to get 101°, but round to the next furthest marking, which is 100° (my compass has 2° markings). If I’d rounded to 102°, the error in my bearing could have taken me to the other side of the feature, and I’d get geographically embarrassed.
Another example. The feature I want to get to is supposed to be at 260°M. I would aim North a little, so I’d turn the dial to 264°. Since 264° is already on one of the markings on the dial, I’ll leave it there.
Remember that bearing off or aiming off only works if the feature that you are looking for is located on or near a linear feature such as a road, fence or river. Also, it doesn’t matter whether you aim North of your target or south of your target, as long as you aim to miss.
Following a Bearing
Never make the mistake of following your compass. Use it as a navigation tool, not a walking guide. If you keep following your compass, you may end up far off track because you will keep walking around trees and boulders, looking for creek crossings and finding gates in fences.
A better way to navigate is to use your compass to find a landmark or feature that is clearly visible, that also happens to be on (or close to) your bearing. For example, use boulders, huts, bridges, nearby mountains. Once you have selected the object, put the compass away and walk towards the object. When you reach it, repeat the process.
Whatever you use, make sure the object you pick is between yourself and the place you are heading. This way, when you arrive at that object, you know that you are heading in the right direction to get to your destination. Then you can repeat the process to get closer to your target.
Another hint – don’t pick a “landmark” which is ambiguous. For example, from a long way off, you may see one tree that looks a lot taller than the other ones. When you get up close, all the trees are tall, and it’s hard to pick which one was the tallest one. Similarly, from a long way off, that rock may seem to have a lot more moss on in that the others around it. However, when you get up close, all the rocks have moss on them, in different shades of green, and you can’t quite pick the rock you were aiming for.
Back Bearing
Every now and then, take a back bearing to make sure you are in the right direction from where you came. To do this, simply turn the whole compass (leave the dial alone) until the white or black half of the compass needle is above the red arrow on the base of the dial. If you look along the Direction Of Travel arrow, you should see the place or feature that you came from. If not, move yourself so that you can!
Written by Peter Shave